Eagle Pose Yoga Sequence for Balance, Strength and Focus

Eagle Pose Yoga Sequence for Balance, Strength and Focus
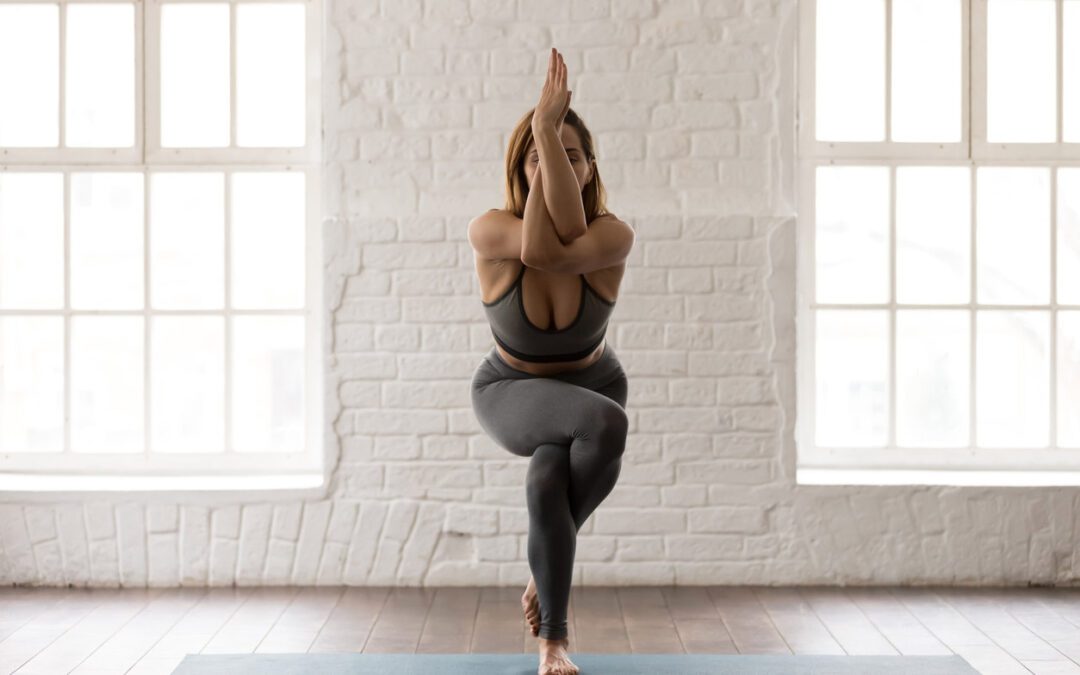
Discover the Benefits of Eagle Pose, Garudasana for Better Balance and Focus​Eagle Pose, or Garudasana, is a standing balance that combines single-leg strength, coordination, shoulder mobility and body awareness. It can feel compact and challenging, which makes it a useful pose for practicing focus without needing to force a large range of motion.

This sequence builds around Eagle Pose and includes standing strength, balance and slower recovery work.

What Eagle Pose Can Help You Develop

Eagle Pose can challenge:

  • single-leg balance
  • coordination
  • hip and ankle stability
  • upper-back and shoulder mobility
  • body awareness
  • concentration

The wrapped position may also create a feeling of stretch across the upper back and outer hips, depending on your anatomy.

Start With Eagle on Your Back

Lie on your back and cross one thigh over the other.

You can also wrap the arms into Eagle Arms.

This lets you explore the shape without needing to balance.

Try gently drawing the elbows and knees toward one another, then relax.

Warm Up With Sun Salutations

Move through a few rounds of Sun Salutation A and B.

Keep the pace steady enough that you can breathe comfortably.

Use the warm-up to prepare the shoulders, hips and legs before adding balance work.

Eagle Pose

Stand tall and shift weight into one leg.

Cross the opposite thigh over the standing leg.

You can:

  • keep the toes on the floor
  • wrap the foot behind the calf
  • use a wall for support

For the arms, cross one arm under the other and either press the backs of the hands together or wrap the forearms.

Sit back slightly and keep the standing foot grounded.

Eagle Crunch

From Eagle Pose, draw the elbows and knees slightly toward one another.

Move slowly and keep the range small.

This adds more core and balance challenge.

Return to upright before repeating.

Crescent Lunge to Warrior I

Unwind from Eagle and step back into Crescent Lunge.

Then transition into Warrior I.

Keep the front knee comfortable and adjust the stance until you feel stable.

Warrior II

Open into Warrior II.

Let the hips organize naturally rather than forcing them into one exact position.

Stay for a few breaths.

Side Angle Pose

Bring the forearm to the thigh or the hand to a block.

Reach the top arm overhead or keep it on the hip.

Choose the version that lets you keep breathing comfortably.

Triangle Pose

Straighten the front leg and move into Triangle.

Use a block if needed.

Think about length through the torso rather than trying to reach the hand as low as possible.

Wide-Leg Forward Fold With Twist

Step the feet wide and fold forward.

Place one hand on the floor or a block and rotate gently through the upper body.

Repeat on the other side.

Eagle With Warrior III

Return to Eagle Pose.

From there, experiment with Eagle Arms while hinging into Warrior III.

Keep the standing knee soft and use a wall if needed.

This variation adds a larger balance challenge, so treat it as optional.

Warrior I With Eagle Arms

Step back into Warrior I while keeping the Eagle Arm shape.

Notice how the shoulder position changes the experience of the pose.

If the shoulders feel compressed, release the arms.

Side Angle and Triangle With Arm Variations

Move through Side Angle and Triangle again.

You can keep Eagle Arms, reach the top arm overhead or use another comfortable arm position.

There is no need to bind unless it feels easy and spacious.

Legs Up the Wall

After the standing work, transition into Legs Up the Wall or a wide-leg wall variation.

This is a good place to slow down after balance and strength work.

Stay for several comfortable breaths.

Finish With Savasana

End in Savasana or another resting position.

Let the legs and shoulders relax and notice how the body feels after the more compact Eagle shapes.

Use Eagle as a Focus Practice

Because Eagle Pose asks for balance, wrapping and concentration at the same time, it can be a useful way to practice attention.

That does not mean it automatically reduces anxiety, boosts immunity or “detoxifies” the body.

The value is simpler: it gives you a clear physical task that requires awareness and control.

A Note on Garuda

Garudasana takes its name from Garuda, an important figure in Hindu tradition.

If that symbolism is meaningful to you, you can use it as a reflection on perspective, strength or clarity.

It is better to present that as part of yoga tradition rather than as a universal spiritual interpretation.

If you want to explore balance-focused yoga in person, learn more about Yoga & Mobility Classes in Nanaimo.

You may also enjoy Crow Pose Progressions for Strength, Balance and Confidence and Dancer Pose and Bow Pose Progressions.
Hanumanasana Splits: Building Hip Flexor and Hamstring Mobility Safely

Hanumanasana Splits: Building Hip Flexor and Hamstring Mobility Safely

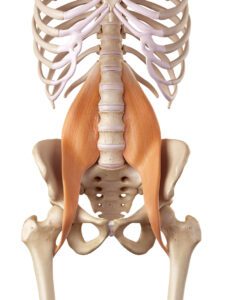
Split, Hanumanasana, psoas muscle, deep core muscle, psoas connected fear

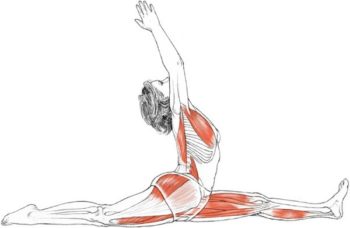
Hanumanasana, or the yoga splits, is a deep mobility pose that asks for significant range through the front of one hip and the hamstrings of the other leg. It can be a meaningful pose to work toward, but it is best approached as a gradual process rather than a test of flexibility.

This sequence focuses on preparing the hips, hamstrings and trunk while removing the idea that tightness in the psoas directly stores fear or trauma.

What the Psoas Actually Does

The psoas is an important hip flexor that helps bring the thigh toward the torso and contributes to trunk and hip movement.

It can feel tight or overworked for many reasons, including sitting, repetitive activity, guarding after pain, training load and individual anatomy.

Stress can influence muscle tension generally, but the psoas is not a special “fear muscle,” and stretching it does not literally release fear or trauma from the body.

Why Hanumanasana Is Challenging

A full split requires a lot of mobility through both legs at the same time.

The front leg needs hamstring length, while the back leg needs hip extension through the hip flexors and quadriceps.

It also requires enough strength and control to support that range.

Warm Up First

Begin with a few minutes of gentle movement.

Useful options include:

  • Cat-Cow
  • kneeling hip circles
  • Low Lunge
  • Half Split
  • glute bridges
  • hamstring sweeps
  • Sun Salutations

Avoid dropping straight into your deepest stretch before the body is warm.

Low Lunge

Step one foot forward into a Low Lunge.

Keep the pelvis comfortable and gently shift forward until you feel a stretch through the front of the back hip.

Do not force the pelvis to square perfectly.

Stay for a few breaths.

Half Split

Shift the hips back and straighten the front leg as much as comfortable.

Keep a soft bend in the knee if needed.

Use blocks under the hands so you do not have to collapse forward.

Move slowly between Low Lunge and Half Split several times.

Pyramid Pose

Straighten both legs into Pyramid Pose.

Keep the stance wide enough to feel stable.

Think about length through the spine rather than trying to bring the chest to the thigh.

Standing Split

Shift weight into the front foot and lift the back leg.

Use blocks or a wall for support.

Standing Split is useful for exploring hamstring length and single-leg control without forcing a floor split.

Warrior III

From standing, hinge forward into Warrior III.

Keep the standing leg strong and the pelvis comfortable.

This adds active strength to the mobility work.

Pigeon or Figure Four

Use Pigeon only if it feels comfortable in your knees and hips.

A reclining Figure Four can be a better choice for many bodies.

There is no need to force the hip into a deep external rotation shape.

Seated Hamstring Work

Try:

  • Staff Pose
  • Head-to-Knee Pose
  • Wide-Leg Seated Forward Fold

Keep the spine long and use a strap if needed.

Think of these as preparation, not a competition to reach farther.

Hanumanasana Progression

From Low Lunge, begin sliding the front foot forward and the back knee backward.

Place blocks under your hands.

Stop well before the point where you feel sharp pain or strain.

You can also place a bolster, folded blanket or block under the pelvis so the pose is supported.

The front knee can remain slightly bent.

You do not need to reach the floor for the pose to be useful.

Use Active Strength

Instead of simply hanging in the stretch, gently press the front heel down and back and the back knee down and forward.

This creates muscular engagement around the range you are using.

Active control is often more useful than passive stretching alone.

PNF-Style Stretching

If you use contract-relax or PNF techniques, keep the contractions gentle.

For example, in a hamstring stretch you might press the heel lightly into the floor for a few seconds, then relax.

Avoid maximal effort.

If you are unsure how to use these techniques, work with someone experienced in mobility or rehabilitation.

What Hanumanasana Can Help Develop

Hanumanasana can challenge:

  • hamstring flexibility
  • hip flexor mobility
  • quadriceps length
  • pelvic control
  • patience
  • body awareness

It is better not to claim that it directly improves anxiety, mental clarity, digestion or “releases stored trauma.”

The Story of Hanuman

Hanumanasana is named after Hanuman, an important figure in the Ramayana who is associated with courage, devotion and service.

The pose is often linked symbolically with Hanuman’s great leap.

That story can be a meaningful part of yoga philosophy if it resonates with you, but it is best presented as traditional context rather than as a medical explanation for what the pose does.

Finish With Recovery

After deep hip and hamstring work, include slower movements such as:

  • Supported Bridge
  • Reclining Figure Four
  • Supine Twist
  • constructive rest
  • Savasana

Let the muscles settle instead of immediately pushing into another deep stretch.

Mobility Does Not Need to Be Forced

A full split is not necessary for health, fitness or a meaningful yoga practice.

Some people will reach the floor easily. Others may never do so because of anatomy, injury history or training priorities.

The goal is not the final shape.

The goal is to build usable range with enough strength and control to feel good in it.

If you want help building hip and hamstring mobility, explore Yoga & Mobility Classes in Nanaimo or Personal Training in Nanaimo.

You may also enjoy Mobility vs. Flexibility: What’s the Difference?.

Crow Pose Progressions: Build Strength, Balance and Confidence

Crow Pose Progressions: Build Strength, Balance and Confidence

Crow pose, benefit crow pose, balance pose yoga

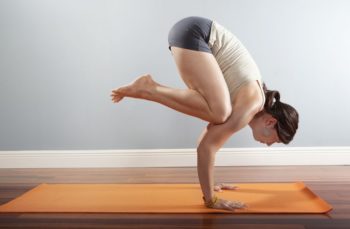
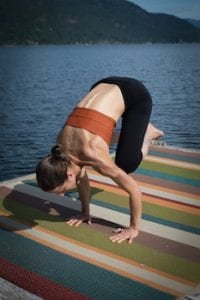
Crow Pose, or Bakasana, is a challenging arm balance that combines upper-body strength, core control, wrist tolerance, balance and coordination. It can also be a satisfying way to practice patience because progress usually happens gradually rather than all at once.

You do not need to “float effortlessly” for the pose to be worthwhile. The real value is in learning how to organize your body, shift your weight and build confidence step by step.

What Crow Pose Can Help You Develop

Crow can challenge:

  • wrist and shoulder strength
  • core engagement
  • balance
  • coordination
  • body awareness
  • confidence with weight-bearing through the hands

The mental focus required for an arm balance can also make the practice feel absorbing and meditative, but I would avoid presenting Crow as a treatment for stress or anxiety.

Start With the Shape on Your Back

Before loading the wrists, practice the basic shape lying down.

Lie on your back with the knees drawn toward the chest. Bring the knees toward the upper arms, round the upper back slightly and engage the abdomen.

Try:

  • holding the shape for 20–30 seconds
  • flexing the wrists as if the palms were pressing into the floor
  • reaching the toes forward
  • bringing one knee at a time toward the centre
  • practicing a hollow-body position

This lets you understand the shape without worrying about balance.

Warm Up the Wrists

Crow puts a lot of load through the hands and wrists, so spend a few minutes preparing them.

From hands and knees, explore:

  • fingers pointing forward and gentle rocking
  • fingers turned slightly outward and side-to-side movement
  • fingers turned toward the knees with a small backward shift
  • very gentle loading on the backs of the hands if comfortable
  • Cat-Cow with attention to shoulder-blade movement

Keep the range small. Wrist preparation should not hurt.

Build Shoulder and Core Control

From hands and knees, bring one knee toward the same-side upper arm.

Lower it, then repeat.

You can also hover the knee slightly off the floor for a few seconds.

Add a few controlled transitions between Plank and Downward-Facing Dog to prepare the shoulders and trunk.

Warm Up With Sun Salutations

Move through 2–3 comfortable Sun Salutations.

Use this section to warm the whole body rather than rushing.

You might include:

  • Downward-Facing Dog
  • Plank
  • Cobra
  • Low Lunge
  • Warrior I
  • Pyramid Pose

Keep breathing steady.

Malasana to Crow Preparation

Come into a Low Squat, or Malasana.

Place the hands on the floor about shoulder-width apart and begin shifting your weight forward.

Keep the toes down at first.

Bring the knees toward the upper arms and practice feeling more weight in the hands without trying to lift both feet.

Use Blocks for Confidence

Blocks can make Crow less intimidating.

One option is to stand on a block so the hips begin higher.

Another is to place a block or bolster in front of the head so you feel less afraid of tipping forward.

The goal is not to rest the head heavily on the block. It is there as reassurance while you learn the weight shift.

Half Crow Progression

From Downward-Facing Dog, lift one leg.

Move forward toward Plank and bring the knee toward the outside of the upper arm.

Repeat 2–3 times.

This builds some of the hip, core and shoulder coordination used in Crow without requiring the full balance.

Practice the Weight Shift

From Malasana:

  1. Place the hands firmly on the mat.
  2. Bend the elbows slightly.
  3. Bring the knees high onto the upper arms.
  4. Look a little forward rather than straight down.
  5. Shift the chest forward.
  6. Lift one foot.
  7. Put it down and try the other side.
  8. If that feels controlled, experiment with lifting both.

The forward shift is essential. If your weight stays behind your hands, the feet will not become light.

Crow Pose

Once both feet lift, bring the feet toward each other and keep the upper back engaged.

You do not need to straighten the arms immediately. A bent-arm Crow is a perfectly valid place to practice.

Hold for one or two breaths at first, then gradually increase the time.

Come down before form breaks down.

Chair to Crow Transition

For a more advanced progression, begin in Chair Pose.

Lower toward a squat, place the hands down and transition into Crow.

This requires more coordination and should come after you are already comfortable entering Crow from Malasana.

Lolasana and Core Work

Lolasana preparation can help develop compression strength.

Sit cross-legged, place the hands beside the hips and press firmly into the floor or blocks.

Try to lift the knees toward the chest, even if the feet do not leave the ground.

You can also include:

  • Boat Pose
  • Half Boat or Hollow Body
  • toe-reach variations
  • seated compression work

These movements support the ability to draw the legs toward the torso.

Counterbalance With Backbends and Chest Opening

After a lot of forward rounding and arm loading, include some comfortable opening movements.

Try:

  • Cobra
  • Bow Pose if appropriate
  • gentle chest and shoulder stretches
  • Supported Bridge
  • Supine Twist

Keep backbends distributed through the whole spine rather than forcing the lower back.

Finish With Rest

End with Savasana or another comfortable resting position.

Arm balances can be mentally demanding, so give yourself a few minutes to let the nervous system settle after the effort.

Progress Takes Repetition

Crow is often more about coordination and confidence than brute strength.

Some days it may feel easy. Other days it may not.

That is normal.

You can practice the pieces separately: wrist preparation, shoulder strength, core compression, squatting, weight shifting and balance.

If you want individualized help with strength, mobility and movement progressions, learn more about Personal Training in Nanaimo or explore Yoga & Mobility Classes in Nanaimo.

Circus Arts for All Ages: Play, Coordination, Creativity and Community

Circus Arts for All Ages: Play, Coordination, Creativity and Community

“Play is the highest form of research.”
– Albert Einstein

Circus arts, all ages, all abilities, creativity, concentration, collaboration, community, art integration, spatial awareness, motor skills refinement, safe risk-taking, play time, juggling

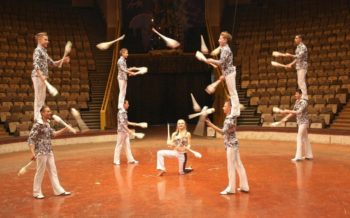
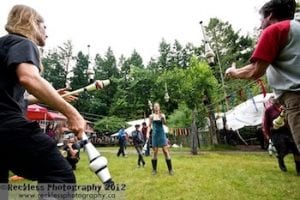
Circus arts bring together movement, play, creativity and skill-building in a way that can feel very different from traditional fitness. Depending on the activity, circus can include juggling, poi, hula hooping, balance, acrobatics, object manipulation, partner work and performance-based movement.

What I love most about circus arts is that there are many different ways to participate. You do not need to be an acrobat or performer to benefit from learning a new skill.

Circus Arts as Movement and Play

Circus arts can challenge coordination, balance, timing, spatial awareness and concentration.

Because many circus skills are learned gradually, they also encourage patience and repetition. You try something, adjust, try again and eventually notice progress.

That process can be satisfying because the skill itself becomes the goal.

A Different Way to Be Active

Circus arts can be a useful form of physical activity because the movement is built into the play.

Juggling, hooping, balancing or learning poi may involve repeated movement without feeling like a conventional workout.

For some people, this makes movement more engaging and easier to stick with.

Coordination and Motor Skills

Many circus activities require the eyes, hands and body to work together.

Juggling, for example, asks you to track moving objects while timing your hands and adjusting your body position.

Other activities may challenge balance, rhythm, reaction time or bilateral coordination.

These skills can be practiced at many levels, from very simple beginner exercises to more complex combinations.

Focus and Attention

Circus skills require concentration because you have to pay attention to what is happening in real time.

If your attention drifts, the object usually drops.

That does not mean circus is automatically meditation, but it can create a strong sense of presence because the task requires immediate feedback and adjustment.

Creativity and Self-Expression

Circus is not only about learning techniques.

Once you understand the basic skill, you can begin combining movements, changing rhythm, creating patterns and developing your own style.

That creative side is one of the reasons circus can appeal to people who may not enjoy traditional sports or gym-based exercise.

Cooperation Instead of Competition

Circus can also create opportunities for collaboration.

Partner activities, group games and small performances can encourage communication, cooperation and shared problem-solving.

The goal does not always have to be winning. Sometimes the challenge is simply figuring something out together.

Building Confidence Through Skill Development

Learning a new circus skill can be frustrating at first.

Dropping a juggling ball or losing balance is part of the process.

Over time, small improvements can build confidence because progress is visible and earned through practice.

That confidence does not need to come from being the best. It can come from realizing that you can learn something that initially felt difficult.

Circus Arts for Children and Adults

Circus activities can be adapted for many ages and experience levels.

Children may enjoy games, object manipulation, balancing and creative movement. Adults may use the same skills for coordination, play, fitness or simply learning something new.

The activity should always match the person’s ability, environment and level of supervision.

Safe Risk-Taking

Some circus activities involve balance, speed or unfamiliar movement.

That makes progression important.

Start with lower-risk skills and build gradually. Use appropriate equipment, enough space and qualified instruction for activities that involve greater height, impact or complexity.

Safe risk-taking means creating challenges that feel exciting without being reckless.

Why Play Matters

Adults often think of play as something only children need.

But playful movement can make exercise more enjoyable and create space for curiosity and experimentation.

You do not need to turn every activity into a workout.

Sometimes moving because it is fun is enough.

Learn to Lead Circus Arts

If you enjoy working with children, schools, community groups or recreational programs, you may be interested in the Circus Arts Leader Certification.

The program focuses on accessible circus skills such as juggling, poi, hula hooping, games and lesson ideas that can be adapted for different groups.

You can also explore my current Circus Arts services in Nanaimo for more about my background in circus-based movement.