Side Crow Yoga Sequence: Twists, Core Strength and Arm-Balance Progressions

Side Crow Yoga Sequence: Twists, Core Strength and Arm-Balance Progressions
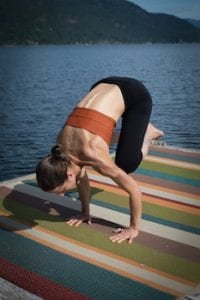
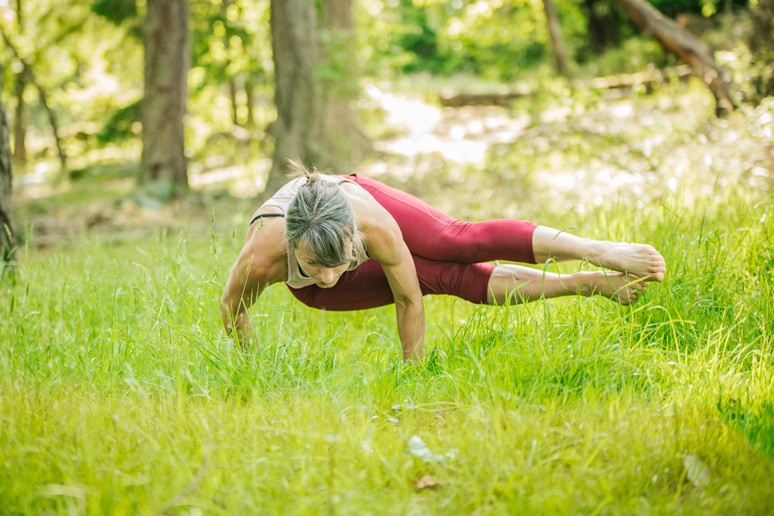
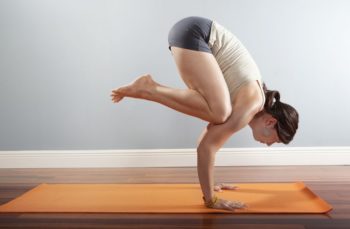
Side crow, kundalini, breath of fire, ong namo, kapotasana, core work oga, twist yoga, kundalini exerciseSide Crow, or Parsva Bakasana, is a challenging arm balance that combines twisting, core control, shoulder stability, wrist loading and balance. It can be an exciting pose to work toward, but it is best approached through progressive preparation rather than by trying to “muscle” into the final shape.

This sequence combines core work, twists, standing poses and Side Crow progressions. It also includes optional breathwork inspired by Kundalini and pranayama traditions.

What Side Crow Can Help You Develop

Side Crow can challenge:

  • core strength
  • shoulder and arm strength
  • wrist tolerance
  • twisting control
  • coordination
  • balance
  • body awareness

The pose also requires concentration, but I would avoid presenting it as a treatment for stress or anxiety.

Start With Core Work

Begin with a few movements that prepare the trunk.

You can try:

  • bicycle crunches
  • Boat Pose
  • twisting Boat
  • cross-legged lift or Lolasana preparation
  • slow knee-to-chest work from Plank

Keep the movements controlled rather than rushing through them.

Warm Up the Wrists and Shoulders

Before arm balancing, spend a few minutes preparing the upper body.

Try:

  • wrist circles
  • rocking forward and back on hands and knees
  • Cat-Cow
  • Plank
  • Downward-Facing Dog
  • shoulder-blade protraction and retraction

If the wrists feel painful, reduce the load or skip the arm balance.

Chair Pose With a Twist

Come into Chair Pose.

Bring the hands to prayer and rotate gently toward one side.

Keep the knees comfortable and the spine long.

You can stay here as a complete variation without progressing to Side Crow.

Standing Twist Flow

Move through a sequence such as:

  • Warrior II
  • Side Angle
  • Triangle
  • Revolved Crescent Lunge
  • Twisting Prayer Lunge
  • Twisting Chair

This helps prepare the spine, hips and trunk for the rotation required in Side Crow.

Side Crow Preparation

From a squat or Twisting Chair, rotate the torso to one side.

Place both hands on the floor about shoulder-width apart.

Bring the outer thigh toward the upper arms.

Shift the chest forward gradually.

At first, keep both feet on the floor.

Lift One Foot

Once you feel stable, lift one foot at a time.

This helps you learn where your centre of mass needs to be without committing fully to the pose.

Keep the elbows bent and the shoulders active.

Side Crow

When ready, shift more weight forward and lift both feet.

Keep the legs together or explore a staggered position depending on the variation.

Hold briefly, then come down with control.

There is no need to hold for a long time.

Use Blocks if Needed

A block under the feet can raise the starting position.

A bolster or block placed in front of you can also reduce fear of tipping forward.

Props are useful tools, not shortcuts.

Progression Into More Advanced Variations

Once Side Crow feels stable, you can explore more challenging transitions such as:

  • Side Crow to Eka Koundinyasana variation
  • Side Crow from Twisting Chair
  • standing twist to arm balance
  • Side Crow from a low squat

Only add these if the wrists, shoulders and core feel ready.

Optional Breathwork: Kapalabhati or Breath of Fire

Kapalabhati and Breath of Fire are both more vigorous breathing practices, but they are not identical in every tradition.

Both involve faster breathing and should be approached carefully.

They are not necessary for Side Crow.

If you choose to use them, learn from an experienced teacher and stop if you feel dizzy, anxious, light-headed or uncomfortable.

People who are pregnant or who have cardiovascular, respiratory or other medical concerns should get professional guidance before practicing forceful breath techniques.

Keep Breathwork Claims Grounded

I would remove claims that rapid breathing:

  • “cleanses toxins”
  • increases cerebrospinal fluid circulation in a specific therapeutic way
  • prevents colds
  • treats respiratory conditions
  • directly balances the nervous system

These are too strong for a general yoga article.

Kundalini-Inspired Mantra Practice

If mantra is part of your personal or teaching practice, you can include it as an optional spiritual element.

Ong Namo Guru Dev Namo is traditionally used in Kundalini Yoga at the beginning of practice.

It can be presented respectfully as a traditional chant associated with that lineage, rather than as a scientifically proven way to access universal wisdom or alter health.

Finish With Pigeon and Rest

After the stronger twisting and arm-balance work, slow the pace down.

Try:

  • Pigeon or Figure Four
  • Child’s Pose
  • Supine Twist
  • Supported Bridge
  • Savasana

Let the wrists and shoulders fully unload.

Focus on Skill, Not Performance

Side Crow is not a measure of how advanced your yoga practice is.

The most useful parts are often the preparation: learning to twist with control, shift weight into the hands, engage the trunk and stay calm while trying something difficult.

If you want to explore arm balances and yoga strength in person, learn more about Yoga & Mobility Classes in Nanaimo.

You may also enjoy Crow Pose Progressions for Strength, Balance and Confidence and Bird of Paradise and Flying Split Yoga Sequence.
Yoga Inversions: A Strength, Balance and Confidence Practice

Yoga Inversions: A Strength, Balance and Confidence Practice

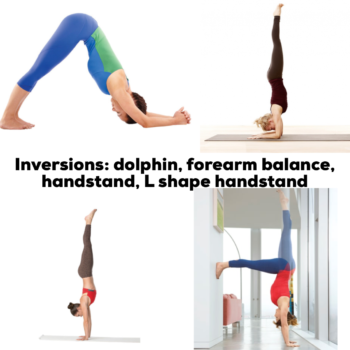
Yoga inversion, inversion, headstand, handstand yogaInversions can be exciting, challenging and intimidating. They ask you to support your body in a different relationship to gravity, which can develop strength, coordination, balance and body awareness.
This class was originally created as part of a yoga lesson-plan series. It includes preparatory core work, forearm strength, wall-supported inversions and slower finishing poses. The goal is not to force yourself upside down, but to build the skills gradually and choose the level that feels appropriate for you.

What Counts as an Inversion?

In yoga, an inversion generally refers to a position where the heart is above the head or the body is partially or fully upside down.

Examples can include:

  • Downward-Facing Dog
  • Dolphin Pose
  • Standing Forward Fold
  • Legs-Up-the-Wall
  • Shoulderstand
  • Headstand
  • Forearm Balance
  • Handstand

Not every inversion requires balancing on the head or hands.

What Inversions Can Help You Develop

Inversions can challenge:

  • upper-body strength
  • shoulder stability
  • core control
  • balance
  • coordination
  • spatial awareness
  • confidence with unfamiliar movement

They can also demand a lot of concentration, which may help you feel very present during the practice.

I would avoid claiming that inversions automatically improve brain function, lymphatic drainage or cardiovascular health. Their clearest benefits are physical skill, strength and movement control.

Start With Hamstrings and Spinal Movement

Begin on your back with a gentle hamstring stretch.

You can use a strap around one foot and keep the opposite leg bent or extended depending on what feels comfortable.

Add a few slow spinal rolls or knee-to-chest movements to warm up the trunk.

Core Preparation

Move into Boat Pose and a lower Boat variation.

You can also use a block between the hands or forearms to create gentle tension and improve awareness through the shoulders and core.

Try:

  • Boat Pose
  • Half Boat
  • Hollow-body hold
  • slow knee tucks

Keep the breath steady.

Warm Up the Wrists and Shoulders

Before loading the upper body, spend time preparing the wrists and shoulders.

From hands and knees, try:

  • gentle forward and backward wrist rocking
  • Cat-Cow
  • shoulder-blade protraction and retraction
  • Plank
  • Downward-Facing Dog

If the wrists are sensitive, spend more time in forearm-based positions.

Dolphin Pose

From Downward-Facing Dog, lower onto the forearms.

Press the forearms into the floor and lift the hips into Dolphin.

This is a useful preparation for Forearm Balance because it develops shoulder strength and introduces the feeling of having more weight above the shoulders.

Dolphin to Forearm Plank

Move slowly between Dolphin and Forearm Plank.

This can help build:

  • shoulder endurance
  • core control
  • awareness of the relationship between ribs, pelvis and shoulders

Repeat only as long as you can maintain good control.

Forearm Side Plank

From Forearm Plank, rotate into a supported Side Plank variation.

Keep the bottom knee down if needed.

This adds lateral core strength and shoulder stability before you move into more demanding inversions.

Sun Salutation and Standing Preparation

Move through a few Sun Salutations to warm the whole body.

You might include:

  • Downward-Facing Dog
  • One-Legged Dog
  • Crescent Lunge
  • Standing Hand-to-Big-Toe variation
  • Standing Split

These poses can help prepare the hamstrings, hips and balance needed for inversion work.

Handstand Preparation at the Wall

The wall can make handstand training much safer and less intimidating.

Start with simple weight-shifting drills rather than trying to kick all the way up.

You might practice:

  • small handstand hops
  • one-leg kick-ups
  • L-shaped Handstand with feet on the wall
  • wall walks
  • holding a supported position for a few breaths

Avoid repeated hard kicking if you do not yet have the shoulder strength and control to receive your body weight.

L-Shaped Handstand

Place the feet on the wall at roughly hip height and walk the hands forward until the hips stack more directly over the shoulders.

This is a great way to experience the inverted shape without balancing freely.

Keep the elbows straight but not locked aggressively, and press the floor away.

Forearm Balance Preparation

Return to Dolphin and practice shifting the shoulders forward.

Try lifting one leg at a time.

If you are working with a wall, use it as support rather than kicking forcefully.

Forearm Balance requires significant shoulder mobility and strength, so there is no need to rush it.

Headstand: Approach With Care

Headstand places much more demand on the neck than poses like Downward Dog or Handstand.

It is not appropriate for everyone and is best learned in person from an experienced teacher.

If you practice it, focus on building support through the forearms and shoulders rather than dumping body weight into the head.

Beginners can get many of the benefits of inversion practice from Dolphin, L-shaped Handstand and wall-supported drills without doing Headstand at all.

When to Skip or Modify Inversions

Avoid or modify inversions if you have an injury or condition that makes them inappropriate, especially issues involving the neck, shoulders, wrists, eyes, cardiovascular system or balance.

If you are pregnant or have a medical condition and are unsure whether inversions are appropriate, check with a qualified healthcare professional.

Stop if you experience pain, numbness, dizziness, visual changes or unusual pressure.

Come Back Down Slowly

After inversion work, give the body time to settle.

Try:

  • Thunderbolt Pose
  • Cow Face arm stretch with a strap
  • gentle shoulder stretches
  • Child’s Pose
  • Supine Twist
  • Savasana

Avoid jumping straight from an intense inversion into another demanding movement.

Inversions and Confidence

One reason people enjoy inversions is that they can change your perspective both literally and mentally.

Learning to support yourself upside down can feel empowering, but confidence comes from preparation, not from forcing the pose.

Progress might mean holding Dolphin longer, feeling steadier in an L-shaped Handstand or simply becoming less afraid of weight-bearing through the arms.

That is still progress.

Stay Present Rather Than Chasing the Pose

Inversion practice can become very goal-oriented.

Try to notice what you are learning along the way: how you breathe under effort, how your shoulders respond, how you manage fear and how your balance changes from day to day.

You do not need to achieve a free-standing Handstand for the practice to be valuable.

If you want to explore strength, mobility and inversion preparation in person, learn more about Yoga & Mobility Classes in Nanaimo or Personal Training in Nanaimo.


Dancer Pose and Bow Pose: Strength, Balance and Backbend Progressions

Dancer Pose and Bow Pose: Strength, Balance and Backbend Progressions

 Dancer pose, natarajasana, bow pose, dhanurasana, Om Namo Shivaya, Shiva, Nataraja

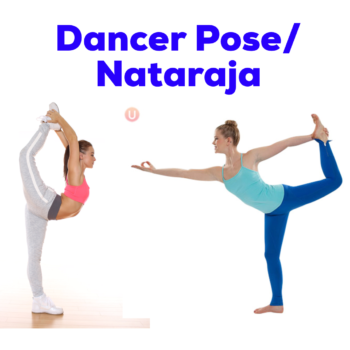
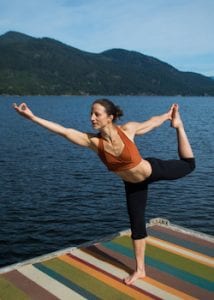
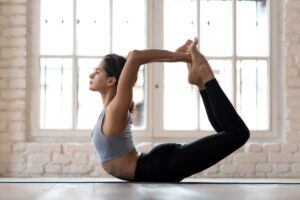
  • Dancer pose, natarajasana, bow pose, dhanurasana, Om Namo Shivaya, Shiva, NatarajaDancer Pose, or Natarajasana, is a balance and backbend that combines standing-leg strength, shoulder mobility, hip extension and coordination. Bow Pose, or Dhanurasana, is a floor backbend that works many of the same areas without requiring single-leg balance.
These poses can be beautiful and challenging, but they do not need to be approached as tests of bravery or flexibility. The most useful approach is to build the pieces gradually and choose a version that feels strong, steady and comfortable.

Start With a Gentle Warm-Up

Begin with movements that prepare the spine, shoulders, hips and quadriceps.

You might include:

  • Child’s Pose
  • Cat-Cow
  • kneeling hip circles
  • Bird Dog
  • gentle quadriceps stretches
  • Low Lunge
  • shoulder mobility
  • a few easy backbends such as Cobra

Move slowly and avoid forcing range before the body feels warm.

Add Sun Salutations

A few rounds of Classical or Modified Sun Salutations can help warm the whole body.

Include movements such as:

  • Forward Fold
  • Low Lunge
  • Plank
  • Cobra
  • Downward-Facing Dog
  • standing transitions

Keep the pace steady enough that the breath remains comfortable.

Prepare the Standing Leg

Dancer Pose requires a lot from the leg you are standing on.

Before attempting the full pose, practice:

  • Tree Pose
  • single-leg balance
  • Warrior III
  • standing knee lifts
  • supported single-leg hinges

Use a wall or chair if balance is the limiting factor.

Prepare the Quadriceps and Hip Flexors

The lifted leg in Dancer requires hip extension and knee flexion, so the front of the thigh may feel quite loaded.

Try a gentle quadriceps stretch while standing or kneeling.

A wall-supported quad stretch can also be useful, but keep the pelvis comfortable and avoid forcing the heel toward the glutes.

Dancer Pose With Support

Stand beside a wall if needed.

Bend one knee and hold the foot or ankle behind you.

Keep the standing knee soft and the torso tall.

From there, gently press the lifted foot back into the hand while reaching the opposite arm forward.

Think about creating length through the front of the body rather than trying to kick the leg as high as possible.

Use a Strap

If reaching the foot comfortably is difficult, loop a yoga strap around the ankle or foot.

This gives you more room to work with shoulder mobility without twisting or collapsing.

A strap is not a lesser version of the pose. It is simply another way to access the shape.

Bow Pose

Lie on your belly with the knees bent.

Reach back and hold the ankles if comfortable.

As you inhale, press the feet gently into the hands and allow the chest and thighs to lift.

Avoid yanking on the feet or throwing the head back.

The lift should come from the whole back body working together.

Modify Bow Pose

If full Bow feels too strong, try:

  • Half Bow with one leg at a time
  • a strap around the ankles
  • Cobra or Locust instead
  • keeping the thighs closer to the floor

Backbends do not need to be deep to be useful.

What Dancer Pose Can Help You Develop

Dancer Pose can challenge:

  • single-leg balance
  • standing-leg strength
  • coordination
  • shoulder mobility
  • hip extension
  • body awareness

Because it combines several demands at once, it is a useful pose for practicing control rather than just flexibility.

What Bow Pose Can Help You Develop

Bow Pose can challenge:

  • back-body strength
  • shoulder mobility
  • hip extension
  • quadriceps length
  • spinal extension

I would avoid saying it automatically improves digestion, fixes posture or relieves stress. Those claims are too broad.

Strength and Mobility Work Together

These poses are a good reminder that flexibility without control is not the whole picture.

Backbends are usually more comfortable when mobility is supported by strength.

You do not need to chase the deepest version of a pose. A smaller shape with better control is often more useful.

A Short Sequence

After warming up, you could move through:

  • Low Lunge
  • Warrior I
  • Warrior III
  • standing quad stretch
  • supported Dancer Pose
  • full or modified Dancer Pose
  • Cobra
  • Locust
  • Half Bow
  • Bow Pose
  • Child’s Pose
  • Supine Twist
  • Savasana

Take your time between stronger backbends.

Yoga Philosophy as Reflection, Not Rule

Dancer Pose is traditionally associated with Nataraja, a form of Shiva linked with cosmic dance, change and transformation.

That symbolism can add meaning to practice if it resonates with you, but it does not need to become a claim that a pose will remove fear, cure suffering or create spiritual transformation.

You can use the theme more simply as a reflection on change, balance and letting movement evolve.

Finish With Rest

End with Child’s Pose, a gentle twist or Savasana.

Let the breath settle and notice how the body feels after the stronger backbending work.

If mantra is part of your practice, you may choose to close with one. If not, silence works just as well.

If you want to explore these movements in person, learn more about Yoga & Mobility Classes in Nanaimo.

You may also enjoy Crow Pose Progressions for Strength, Balance and Confidence and Chaturanga Dandasana: Alignment, Strength and Modifications.

Eagle Pose Yoga Sequence for Balance, Strength and Focus

Eagle Pose Yoga Sequence for Balance, Strength and Focus

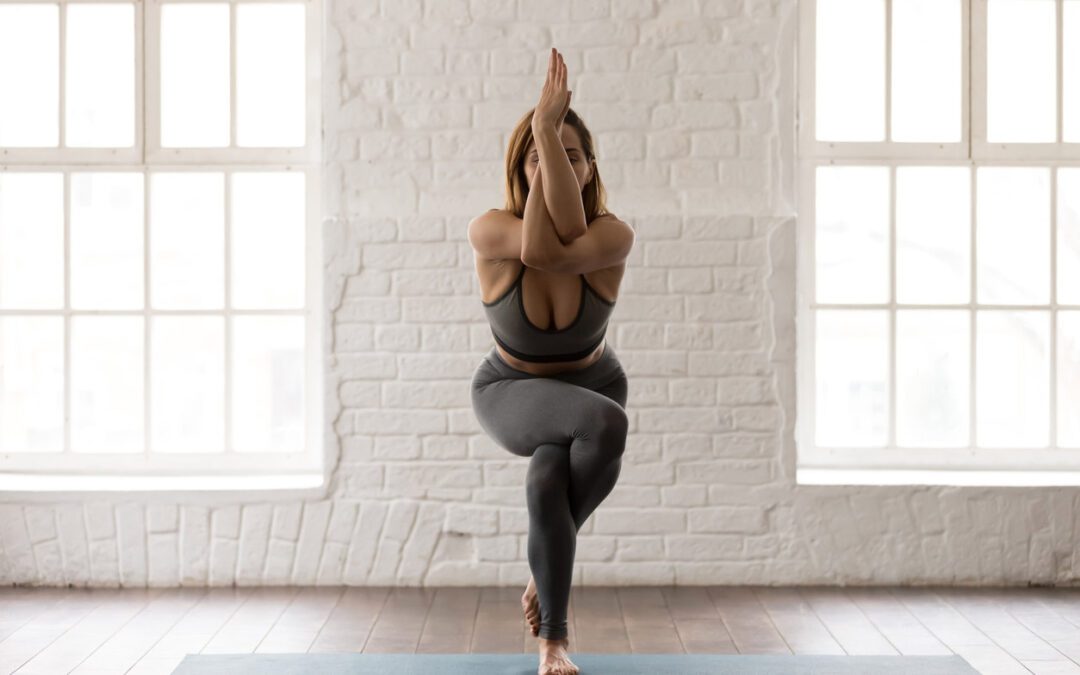
Discover the Benefits of Eagle Pose, Garudasana for Better Balance and Focus​Eagle Pose, or Garudasana, is a standing balance that combines single-leg strength, coordination, shoulder mobility and body awareness. It can feel compact and challenging, which makes it a useful pose for practicing focus without needing to force a large range of motion.
This sequence builds around Eagle Pose and includes standing strength, balance and slower recovery work.

What Eagle Pose Can Help You Develop

Eagle Pose can challenge:

  • single-leg balance
  • coordination
  • hip and ankle stability
  • upper-back and shoulder mobility
  • body awareness
  • concentration

The wrapped position may also create a feeling of stretch across the upper back and outer hips, depending on your anatomy.

Start With Eagle on Your Back

Lie on your back and cross one thigh over the other.

You can also wrap the arms into Eagle Arms.

This lets you explore the shape without needing to balance.

Try gently drawing the elbows and knees toward one another, then relax.

Warm Up With Sun Salutations

Move through a few rounds of Sun Salutation A and B.

Keep the pace steady enough that you can breathe comfortably.

Use the warm-up to prepare the shoulders, hips and legs before adding balance work.

Eagle Pose

Stand tall and shift weight into one leg.

Cross the opposite thigh over the standing leg.

You can:

  • keep the toes on the floor
  • wrap the foot behind the calf
  • use a wall for support

For the arms, cross one arm under the other and either press the backs of the hands together or wrap the forearms.

Sit back slightly and keep the standing foot grounded.

Eagle Crunch

From Eagle Pose, draw the elbows and knees slightly toward one another.

Move slowly and keep the range small.

This adds more core and balance challenge.

Return to upright before repeating.

Crescent Lunge to Warrior I

Unwind from Eagle and step back into Crescent Lunge.

Then transition into Warrior I.

Keep the front knee comfortable and adjust the stance until you feel stable.

Warrior II

Open into Warrior II.

Let the hips organize naturally rather than forcing them into one exact position.

Stay for a few breaths.

Side Angle Pose

Bring the forearm to the thigh or the hand to a block.

Reach the top arm overhead or keep it on the hip.

Choose the version that lets you keep breathing comfortably.

Triangle Pose

Straighten the front leg and move into Triangle.

Use a block if needed.

Think about length through the torso rather than trying to reach the hand as low as possible.

Wide-Leg Forward Fold With Twist

Step the feet wide and fold forward.

Place one hand on the floor or a block and rotate gently through the upper body.

Repeat on the other side.

Eagle With Warrior III

Return to Eagle Pose.

From there, experiment with Eagle Arms while hinging into Warrior III.

Keep the standing knee soft and use a wall if needed.

This variation adds a larger balance challenge, so treat it as optional.

Warrior I With Eagle Arms

Step back into Warrior I while keeping the Eagle Arm shape.

Notice how the shoulder position changes the experience of the pose.

If the shoulders feel compressed, release the arms.

Side Angle and Triangle With Arm Variations

Move through Side Angle and Triangle again.

You can keep Eagle Arms, reach the top arm overhead or use another comfortable arm position.

There is no need to bind unless it feels easy and spacious.

Legs Up the Wall

After the standing work, transition into Legs Up the Wall or a wide-leg wall variation.

This is a good place to slow down after balance and strength work.

Stay for several comfortable breaths.

Finish With Savasana

End in Savasana or another resting position.

Let the legs and shoulders relax and notice how the body feels after the more compact Eagle shapes.

Use Eagle as a Focus Practice

Because Eagle Pose asks for balance, wrapping and concentration at the same time, it can be a useful way to practice attention.

That does not mean it automatically reduces anxiety, boosts immunity or “detoxifies” the body.

The value is simpler: it gives you a clear physical task that requires awareness and control.

A Note on Garuda

Garudasana takes its name from Garuda, an important figure in Hindu tradition.

If that symbolism is meaningful to you, you can use it as a reflection on perspective, strength or clarity.

It is better to present that as part of yoga tradition rather than as a universal spiritual interpretation.

If you want to explore balance-focused yoga in person, learn more about Yoga & Mobility Classes in Nanaimo.

You may also enjoy Crow Pose Progressions for Strength, Balance and Confidence and Dancer Pose and Bow Pose Progressions.

Hanumanasana Splits: Building Hip Flexor and Hamstring Mobility Safely

Hanumanasana Splits: Building Hip Flexor and Hamstring Mobility Safely

Split, Hanumanasana, psoas muscle, deep core muscle, psoas connected fear

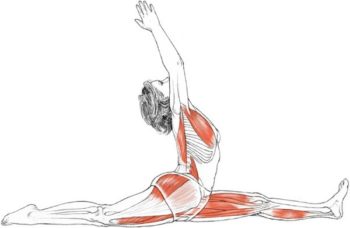
Hanumanasana, or the yoga splits, is a deep mobility pose that asks for significant range through the front of one hip and the hamstrings of the other leg. It can be a meaningful pose to work toward, but it is best approached as a gradual process rather than a test of flexibility.

This sequence focuses on preparing the hips, hamstrings and trunk while removing the idea that tightness in the psoas directly stores fear or trauma.

What the Psoas Actually Does

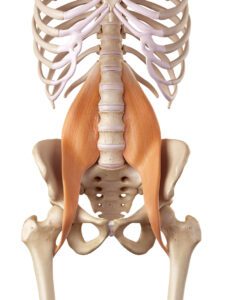
The psoas is an important hip flexor that helps bring the thigh toward the torso and contributes to trunk and hip movement.

It can feel tight or overworked for many reasons, including sitting, repetitive activity, guarding after pain, training load and individual anatomy.

Stress can influence muscle tension generally, but the psoas is not a special “fear muscle,” and stretching it does not literally release fear or trauma from the body.

Why Hanumanasana Is Challenging

A full split requires a lot of mobility through both legs at the same time.

The front leg needs hamstring length, while the back leg needs hip extension through the hip flexors and quadriceps.

It also requires enough strength and control to support that range.

Warm Up First

Begin with a few minutes of gentle movement.

Useful options include:

  • Cat-Cow
  • kneeling hip circles
  • Low Lunge
  • Half Split
  • glute bridges
  • hamstring sweeps
  • Sun Salutations

Avoid dropping straight into your deepest stretch before the body is warm.

Low Lunge

Step one foot forward into a Low Lunge.

Keep the pelvis comfortable and gently shift forward until you feel a stretch through the front of the back hip.

Do not force the pelvis to square perfectly.

Stay for a few breaths.

Half Split

Shift the hips back and straighten the front leg as much as comfortable.

Keep a soft bend in the knee if needed.

Use blocks under the hands so you do not have to collapse forward.

Move slowly between Low Lunge and Half Split several times.

Pyramid Pose

Straighten both legs into Pyramid Pose.

Keep the stance wide enough to feel stable.

Think about length through the spine rather than trying to bring the chest to the thigh.

Standing Split

Shift weight into the front foot and lift the back leg.

Use blocks or a wall for support.

Standing Split is useful for exploring hamstring length and single-leg control without forcing a floor split.

Warrior III

From standing, hinge forward into Warrior III.

Keep the standing leg strong and the pelvis comfortable.

This adds active strength to the mobility work.

Pigeon or Figure Four

Use Pigeon only if it feels comfortable in your knees and hips.

A reclining Figure Four can be a better choice for many bodies.

There is no need to force the hip into a deep external rotation shape.

Seated Hamstring Work

Try:

  • Staff Pose
  • Head-to-Knee Pose
  • Wide-Leg Seated Forward Fold

Keep the spine long and use a strap if needed.

Think of these as preparation, not a competition to reach farther.

Hanumanasana Progression

From Low Lunge, begin sliding the front foot forward and the back knee backward.

Place blocks under your hands.

Stop well before the point where you feel sharp pain or strain.

You can also place a bolster, folded blanket or block under the pelvis so the pose is supported.

The front knee can remain slightly bent.

You do not need to reach the floor for the pose to be useful.

Use Active Strength

Instead of simply hanging in the stretch, gently press the front heel down and back and the back knee down and forward.

This creates muscular engagement around the range you are using.

Active control is often more useful than passive stretching alone.

PNF-Style Stretching

If you use contract-relax or PNF techniques, keep the contractions gentle.

For example, in a hamstring stretch you might press the heel lightly into the floor for a few seconds, then relax.

Avoid maximal effort.

If you are unsure how to use these techniques, work with someone experienced in mobility or rehabilitation.

What Hanumanasana Can Help Develop

Hanumanasana can challenge:

  • hamstring flexibility
  • hip flexor mobility
  • quadriceps length
  • pelvic control
  • patience
  • body awareness

It is better not to claim that it directly improves anxiety, mental clarity, digestion or “releases stored trauma.”

The Story of Hanuman

Hanumanasana is named after Hanuman, an important figure in the Ramayana who is associated with courage, devotion and service.

The pose is often linked symbolically with Hanuman’s great leap.

That story can be a meaningful part of yoga philosophy if it resonates with you, but it is best presented as traditional context rather than as a medical explanation for what the pose does.

Finish With Recovery

After deep hip and hamstring work, include slower movements such as:

  • Supported Bridge
  • Reclining Figure Four
  • Supine Twist
  • constructive rest
  • Savasana

Let the muscles settle instead of immediately pushing into another deep stretch.

Mobility Does Not Need to Be Forced

A full split is not necessary for health, fitness or a meaningful yoga practice.

Some people will reach the floor easily. Others may never do so because of anatomy, injury history or training priorities.

The goal is not the final shape.

The goal is to build usable range with enough strength and control to feel good in it.

If you want help building hip and hamstring mobility, explore Yoga & Mobility Classes in Nanaimo or Personal Training in Nanaimo.

You may also enjoy Mobility vs. Flexibility: What’s the Difference?.

Crow Pose Progressions: Build Strength, Balance and Confidence

Crow Pose Progressions: Build Strength, Balance and Confidence

Crow pose, benefit crow pose, balance pose yoga

Crow Pose, or Bakasana, is a challenging arm balance that combines upper-body strength, core control, wrist tolerance, balance and coordination. It can also be a satisfying way to practice patience because progress usually happens gradually rather than all at once.

You do not need to “float effortlessly” for the pose to be worthwhile. The real value is in learning how to organize your body, shift your weight and build confidence step by step.

What Crow Pose Can Help You Develop

Crow can challenge:

  • wrist and shoulder strength
  • core engagement
  • balance
  • coordination
  • body awareness
  • confidence with weight-bearing through the hands

The mental focus required for an arm balance can also make the practice feel absorbing and meditative, but I would avoid presenting Crow as a treatment for stress or anxiety.

Start With the Shape on Your Back

Before loading the wrists, practice the basic shape lying down.

Lie on your back with the knees drawn toward the chest. Bring the knees toward the upper arms, round the upper back slightly and engage the abdomen.

Try:

  • holding the shape for 20–30 seconds
  • flexing the wrists as if the palms were pressing into the floor
  • reaching the toes forward
  • bringing one knee at a time toward the centre
  • practicing a hollow-body position

This lets you understand the shape without worrying about balance.

Warm Up the Wrists

Crow puts a lot of load through the hands and wrists, so spend a few minutes preparing them.

From hands and knees, explore:

  • fingers pointing forward and gentle rocking
  • fingers turned slightly outward and side-to-side movement
  • fingers turned toward the knees with a small backward shift
  • very gentle loading on the backs of the hands if comfortable
  • Cat-Cow with attention to shoulder-blade movement

Keep the range small. Wrist preparation should not hurt.

Build Shoulder and Core Control

From hands and knees, bring one knee toward the same-side upper arm.

Lower it, then repeat.

You can also hover the knee slightly off the floor for a few seconds.

Add a few controlled transitions between Plank and Downward-Facing Dog to prepare the shoulders and trunk.

Warm Up With Sun Salutations

Move through 2–3 comfortable Sun Salutations.

Use this section to warm the whole body rather than rushing.

You might include:

  • Downward-Facing Dog
  • Plank
  • Cobra
  • Low Lunge
  • Warrior I
  • Pyramid Pose

Keep breathing steady.

Malasana to Crow Preparation

Come into a Low Squat, or Malasana.

Place the hands on the floor about shoulder-width apart and begin shifting your weight forward.

Keep the toes down at first.

Bring the knees toward the upper arms and practice feeling more weight in the hands without trying to lift both feet.

Use Blocks for Confidence

Blocks can make Crow less intimidating.

One option is to stand on a block so the hips begin higher.

Another is to place a block or bolster in front of the head so you feel less afraid of tipping forward.

The goal is not to rest the head heavily on the block. It is there as reassurance while you learn the weight shift.

Half Crow Progression

From Downward-Facing Dog, lift one leg.

Move forward toward Plank and bring the knee toward the outside of the upper arm.

Repeat 2–3 times.

This builds some of the hip, core and shoulder coordination used in Crow without requiring the full balance.

Practice the Weight Shift

From Malasana:

  1. Place the hands firmly on the mat.
  2. Bend the elbows slightly.
  3. Bring the knees high onto the upper arms.
  4. Look a little forward rather than straight down.
  5. Shift the chest forward.
  6. Lift one foot.
  7. Put it down and try the other side.
  8. If that feels controlled, experiment with lifting both.

The forward shift is essential. If your weight stays behind your hands, the feet will not become light.

Crow Pose

Once both feet lift, bring the feet toward each other and keep the upper back engaged.

You do not need to straighten the arms immediately. A bent-arm Crow is a perfectly valid place to practice.

Hold for one or two breaths at first, then gradually increase the time.

Come down before form breaks down.

Chair to Crow Transition

For a more advanced progression, begin in Chair Pose.

Lower toward a squat, place the hands down and transition into Crow.

This requires more coordination and should come after you are already comfortable entering Crow from Malasana.

Lolasana and Core Work

Lolasana preparation can help develop compression strength.

Sit cross-legged, place the hands beside the hips and press firmly into the floor or blocks.

Try to lift the knees toward the chest, even if the feet do not leave the ground.

You can also include:

  • Boat Pose
  • Half Boat or Hollow Body
  • toe-reach variations
  • seated compression work

These movements support the ability to draw the legs toward the torso.

Counterbalance With Backbends and Chest Opening

After a lot of forward rounding and arm loading, include some comfortable opening movements.

Try:

  • Cobra
  • Bow Pose if appropriate
  • gentle chest and shoulder stretches
  • Supported Bridge
  • Supine Twist

Keep backbends distributed through the whole spine rather than forcing the lower back.

Finish With Rest

End with Savasana or another comfortable resting position.

Arm balances can be mentally demanding, so give yourself a few minutes to let the nervous system settle after the effort.

Progress Takes Repetition

Crow is often more about coordination and confidence than brute strength.

Some days it may feel easy. Other days it may not.

That is normal.

You can practice the pieces separately: wrist preparation, shoulder strength, core compression, squatting, weight shifting and balance.

If you want individualized help with strength, mobility and movement progressions, learn more about Personal Training in Nanaimo or explore Yoga & Mobility Classes in Nanaimo.